


![The Fishermen Softball team had their work cut out for them against #2 Norton in the Elite 8 and failed to jump back from an early 7-0 deficit. [Photo courtesy of Dawn Enos]](https://thegillnetter.com/wp-content/uploads/2026/06/709166380_10164685011414728_8841526148411460004_n-1200x801.jpg)
![Abby Noble allowed just two hits across seven innings of work, sending Gloucester to their third straight Sweet 16. [Photo courtesy of Dawn Enos]](https://thegillnetter.com/wp-content/uploads/2026/06/689006146_10164619441929728_5207318100033678928_n-2-1200x801.jpg)
![Boys 4x400m poses with medals from left to right Vincent Mannone, Jefferson do Carmo, Seamus Linehan, Deion Kasera.
[Photo Courtesy of David Coleman]](https://thegillnetter.com/wp-content/uploads/2026/06/IMG_2470-1200x900.jpeg)
![The GHS Softball and Baseball teams are set to enter the playoffs this week, both hosting the Round of 32 on the island.
[Photo Courtesy of Dawn Enos and the MIAA]](https://thegillnetter.com/wp-content/uploads/2026/06/Power-Rankings-1080x1080-1.png)
![The Gloucester DECA chapter poses together after the Grand Award Ceremony. [Photo courtesy of Gloucester DECA]](https://thegillnetter.com/wp-content/uploads/2026/03/IMG_7994-1200x736.jpeg)


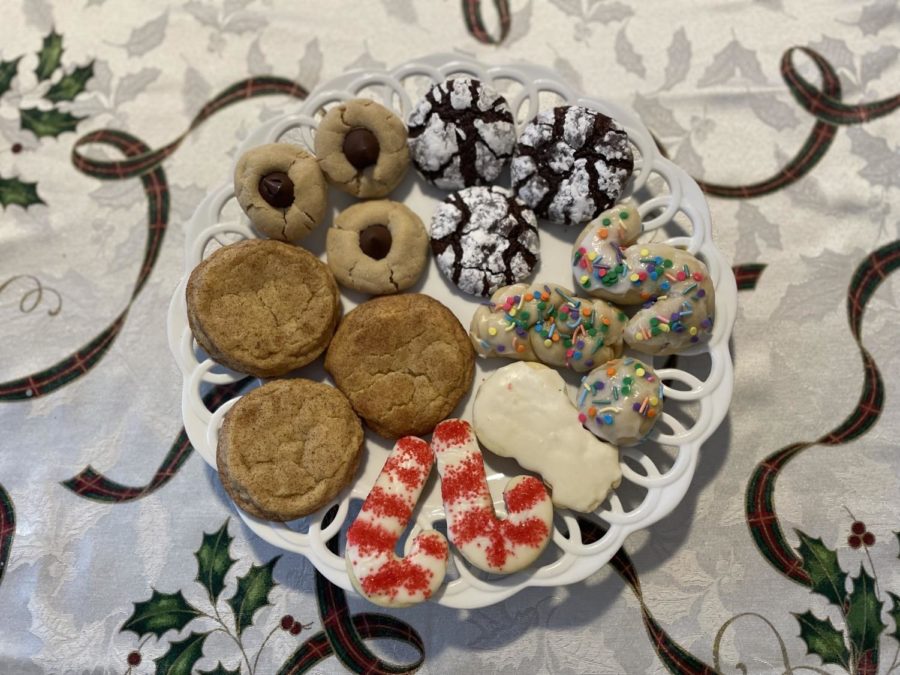
6 cookies recipes to fill you with holiday cheer
December 16, 2022
It’s that wonderful time of year again. Snow falling on the ground, pretty Christmas lights adorning houses all around town, and the spirit of family filling the air. But what just might be the most wonderful thing about the holiday season would be the delicious foods everyone gets to enjoy. Specifically, the Christmas cookies.
The tradition of making Christmas cookies began centuries ago, when monks from the Middle Ages had access to spices and ingredients that would forever be associated with holiday treats, such as cinnamon, cloves, ginger, and cardamom. In the 1600s, the Dutch would bring over the recipes and traditions to the newly discovered Americas where these cookies could be shared and treasured.
In the 1930s, though, is when the Christmas cookies that are known and loved today came about. The invention of refrigeration allowed for chilled doughs to be made, helping to create a fan-favorite cookie of today known as the sugar cookie.
With that brief history in mind, I decided to attempt to make some cookies in honor of the holiday season. But first, I had to figure out which kind.
I tried to find a few that correlated with the Christmas season. Obviously, I was going to make chocolate chip cookies, as my recipe never fails to bring me Christmas cheer. Then, I decided on attempting sugar cookies as well due to their significance with the season. I also decided to make some Italian “S” cookies as they are usually baked and served around Christmas time. Well, in my family at least.
The peanut butter blossom was my third choice, as those Hershey Kisses commercials about making the treats are incredibly convincing and heartwarming. My last options were special requests from family- the snickerdoodle and the chocolate crinkle.
Now that I had my choices ready, it was time to bake.
Chocolate Chip
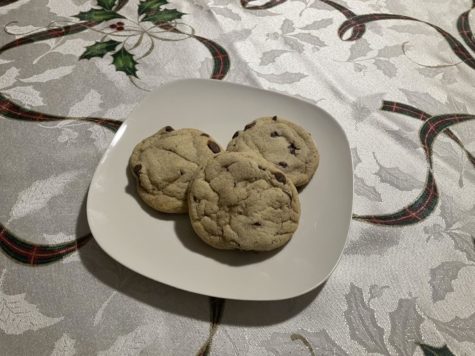
Chocolate chip cookies are always a fan favorite in the Orlando household, and since it’s Christmas time, these cookies seemed to be more special.
The recipe is very straightforward and easy to follow, however, there are a few tricks in order to make sure these cookies taste their absolute best.
First, I started by adding the shortening, butter, white sugar, and brown sugar to my electric mixer. I waited until those ingredients were well combined and smooth before adding the eggs and vanilla extract to the bowl. Once all of the previous ingredients were combined, I proceeded to add in the flour, baking soda and salt. It took about 3 minutes for a dough to form and then I added in the focal ingredient of this recipe, the chocolate chips.
Now, I don’t use an exact measurement when it comes to chocolate chips so I would just pour until it feels like enough.
The big “secret” to this recipe would just be to make sure the dough rolled out into balls so they’ll have a nicer shape when they are baked. Once the cookies are all rolled out and on baking sheets, they should be placed in the oven for 10-12 minutes and tada! The perfect chocolate chip cookie is ready to be enjoyed.
Again, this recipe is very simple and easy to follow and hopefully these cookies will become a favorite for your families too.
Recipe:
⅔ cup of shortening (Crisco)
⅔ cup of butter, softened
1 cup of white sugar
1 cup of brown sugar
2 eggs
1 teaspoon of vanilla extract
3 cups of flour
1 teaspoon of baking soda
1 teaspoon of salt
At least 8 oz of chocolate chips
Preheat oven to 375° and bake for 10-12 minutes
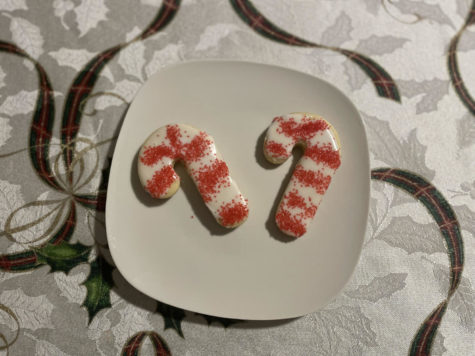
Sugar Cookie
Sugar cookies are certainly a staple of the Christmas season and this year I decided to bake a batch in order to understand the hype around them. What nobody told me, though, was that these cookies would be exhausting to make.
I started by putting my butter and sugar in a mixing bowl and creaming them together until the texture was smooth. I then poured in my vanilla and almond extracts as well as my eggs and began to mix again to combine the new ingredients. In a separate bowl, I combined the flour, baking powder, and salt. I slowly poured small amounts of the dry ingredients into the bowl so as to not overwhelm the mixer, but flour still proceeded to go all over my kitchen somehow. Once all of the ingredients were combined, the dough began to look crumbly and I began to worry.
I did a bit of research and learned that the dough was supposed to turn out crumbly and that it needed to be kneaded in order to become an actual dough. So, I rolled up my sleeves and began to knead the dough.
I kneaded for a solid 15 minutes and boy oh boy were my arms sore. I then used my rolling pin to flatten the ball I made and used some festive cookie cutters to make some holiday shapes and I put those in the oven for 7 minutes.
I let the cookies cool after a while and proceeded to make some icing in the meantime. The recipe I had only called for confectioners sugar and milk, and needless to say, it came out wonderful. Once the cookies were cooled, I decorated them and let them sit out to dry.
Overall, I’d say these cookies were a success considering it was my first time baking them. I would just beware of the amount of elbow grease it takes to make them.
Recipe
1 cup of unsalted butter, softened (one stick)
1 cup of white sugar
1 teaspoon of vanilla extract
½ teaspoon of almond extract
1 egg
2 teaspoons of baking powder
½ teaspoon of salt
3 cups of flour
Preheat the oven to 350° and bake for 6-8 minutes.
Icing
2 cups of confectioners sugar
2 tablespoons of milk
Peanut Butter Blossom
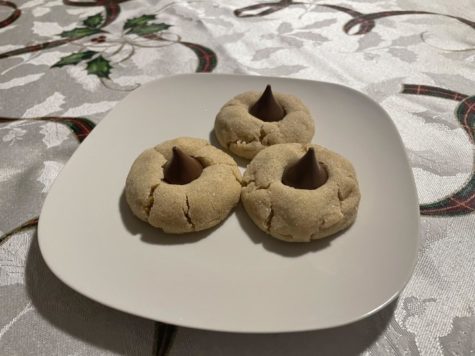
After my tiring time with the sugar cookies, I attempted a less strenuous recipe so graciously gifted to me by my Mother, called the “peanut butter blossom.” She’s made these cookies for years and I was excited to make them myself after tasting how delicious they were every Christmas.
As usual, I started by preheating my oven only this time it would be to 400 degrees. I then started adding in the white sugar, brown sugar, peanut butter and butter to my electric mixer. I then proceeded to add the egg, flour, baking soda, and baking powder into the more liquidish dough. After mixing the ingredients until the dough was formed, I began to create the cookie shapes.
What really makes these cookies delicious, though, is not the copious amounts of peanut butter, but the additional sugar coating the dough is rolled in. Each ball of dough should be well covered in the sugar and then placed on a baking sheet. The cookies should then be baked for 8-10 minutes, and don’t worry if they look a little deformed, that’s what the Hershey’s Kisses are for.
Another key piece of this recipe would be the Hershey’s Kisses that are placed atop the cookies as soon as they come out of the oven. But how many candies do you need? Well, a tip from Mrs. Orlando herself would be to unwrap the candy as the cookies are baking so you know exactly how many you need.
These cookies are certain to bring Christmas cheer into any household and are definitely one of the easier recipes here on this list if you’re looking for something simple.
Measurements
½ cup of white sugar
½ cup of brown sugar
½ cup of creamy peanut butter
½ cup of butter, softened
1 egg
1 ½ cups of flour
¾ teaspoon of baking soda
½ teaspoon of baking powder
At least 36 Hershey’s Kisses
Italian “S” Cookie
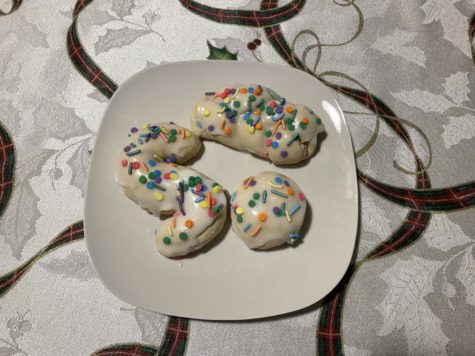
Making the Italian “S” cookie is certainly a trial-and-error experience. Usually, I would make these cookies with my grandmother a few days before Christmas so they are fresh, but I decided I wanted to try baking them on my own for the first time.
And although this isn’t her exact recipe (because that is “top secret”), I still think this one is worth sharing.
Before I began baking, I preheated my oven to 350 degrees. Then I started adding the butter and sugar to the electric mixer and creamed them together until the consistency was smooth. Then, I added my eggs, milk, and vanilla extract and mixed again. I then measured out my flour, baking powder, and salt. I quickly mixed together the dry ingredients and then slowly added those ingredients to the other mixture.
Now, here’s where I might have gone wrong. The consistency of the dough is supposed to be somewhat sticky. I, however, was not aware of this and added in an extra 1 ¾ cups of flour to try and make the dough more doughy. I was feeling pretty good about how the dough was looking and feeling after my unnecessary additions of flour, so I began to make the shapes.
I made a few rope-looking cookies, some braided ones and just a few basic round cookies too. I also had to roll them in flour before placing them on the baking sheet which should’ve been another red flag that this was not going in the right direction. The cookies should be done after about 8-10 minutes in the oven, but not my creations.
I also realized after putting them in the oven that I had not made my cookies thick enough so that they would cook all the way through. So, I had to keep them in the oven for an extra 5 or so minutes.
Once the cookies were finally baked all the way through, I set them out to cool for a while and made some icing with confectioners sugar and milk in the meantime. Thankfully, the icing covered up the cracks and blemishes on the cookies and made them look edible.
This recipe certainly takes a lot of skill to master, and measurements have to be exact in order for the cookies to be perfect. Although this isn’t my grandma’s exact recipe, I’d say if done the right way (and without excessive additions of flour), this recipe could be a distant second.
Measurements
1 cup of shortening (Crisco)
1 cup of sugar
4 eggs
2 tablespoons of vanilla extract
4 tablespoons of milk (divided into 2)
4 cups of flour
1 cup of confectioners sugar
Snickerdoodle
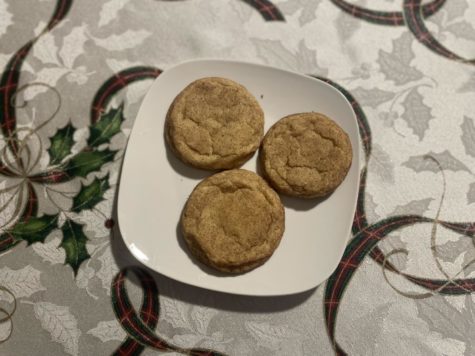
If you want your house to smell like cinnamon sugar for the next day or so, then this is the recipe for you. Snickerdoodles are certainly a staple cookie of the Christmas season, and now I understand why.
First, preheat the oven to 400 degrees. Then, like every other recipe on this list, you’ll want to cream together the butter and sugar until smooth. In a separate bowl, mix together the flour, baking powder, cream of tartar, and salt. Set that bowl of dry ingredients aside, and add in the eggs, milk, and vanilla extract to the butter and sugar mixture.
Once everything in the mixture is combined, slowly add in the dry ingredients to form the dough. The dough should stick to the bowl but shouldn’t be plastered onto the sides. (yes I checked after my last experience with sticky dough). Now that the dough was ready to be shaped, I set it aside for a few minutes and began to make the coating.
The coating recipe is very simple, all you’ll need to do is mix together cinnamon and sugar into a small bowl, but big enough to roll small balls of dough in.
Now, you can begin to roll out the dough balls. Before placing them on the baking sheet, roll the dough in the cinnamon sugar mixture and then bake for at least 8 minutes. Let them cool for at least 2 minutes before consumption.
This next step is optional, but it definitely helps the overall taste and appearance of the cookie. If you feel inclined to do so, you can sprinkle some of the cinnamon sugar onto the final product, giving the cookies a sweeter and longer-lasting flavor.
I’d be lying if I didn’t say I had my doubts about making these at first but after tasting the final result, my doubts soon disappeared into the cinnamon-y goodness that is the snickerdoodle.
Measurements
2 ¾ cups of flour
2 teaspoons of cream of tartar
1 teaspoon of baking soda
¾ teaspoons of salt
1 ¾ cups of sugar (divided into 1 ½ cups and ¼ cups)
1 cup of shortening (Crisco)
2 eggs
2 tablespoons of milk
2 teaspoons of vanilla extract
1 tablespoon of cinnamon
Chocolate Crinkle
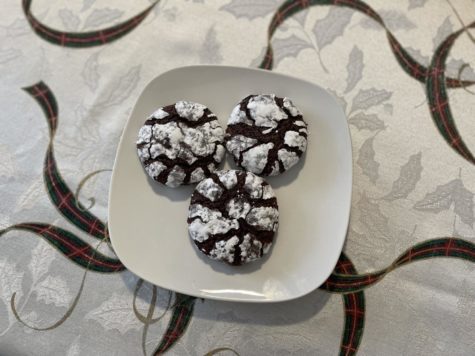
I recommend setting a whole day aside if anyone decides to attempt baking the chocolate crinkle cookie, but the results are definitely worth every minute.
I started by once again preheating my oven to 350 degrees for this recipe. Then, I began to add sugar, cocoa powder, vegetable oil, vanilla extract, and eggs to my mixing bowl. While this was mixing, I combined flour, baking powder and salt into a different bowl. After my dry ingredients were combined, I slowly added them into the less-dry mixture and combined all the ingredients until the batter was smooth.
Unfortunately, the quick and easy aspect of this recipe was over, as I learned that this dough had to be chilled before I could continue with my recipe. The dough needed to stay in the refrigerator for at least 3 hours, but I had started this recipe later in the evening so it was going to have to stay there overnight.
I worried the next day during school about whether or not the dough would be okay sitting in the cold overnight. But, I was pleasantly surprised when I returned home and found that the dough had a normal consistency.
I continued on with the recipe and reheated my oven, forming each and every dough ball carefully and then promptly dipping each one into a bowl of confectioners sugar. Once the dough was ready, I set them in the oven for about 12 minutes.
Once I took them out of the oven, a smell of chocolatey goodness filled the air. I let them cool for a few minutes while I cleaned up and decided to try one of my creations. It tasted very similar to a brownie, but if a brownie was fluffier and denser.
I would consider this recipe to be an overall sweet success, despite the overnight chilling setbacks that I probably should have seen coming in the first place.
Measurements
½ cups of unsweetened cocoa powder
1 cup of white sugar
½ cup of vegetable oil
2 eggs
1 teaspoon of vanilla extract
1 cup of flour
1 teaspoon of baking powder
¼ teaspoon of salt
½ cup of confectioners sugar
Conclusion
Overall, I would say that my Christmas cookie-baking experience was certainly an interesting yet successful one. The only downside is that my kitchen is now covered in flour and I have more cookies in my house than I know what to do with. Anyway, These recipes are sure to bring holiday cheer into your home no matter which one you decide to bake and I guarantee that Santa Claus himself would love them too.